McCormick® Assorted Food Colors Tips and Fool-Proof Hard-Cooked Eggs

Easter is only a few weeks away, so time to starting thinking about fun, creative ways to decorate hard-cooked eggs for the season! I can still remember the smell of vinegar as a young girl, as my sisters and I would dye eggs (and make a royal mess). :) But it was so fun! I loved to let my eggs sit in the dye as long as possible, so they’d be nice and rich in color!
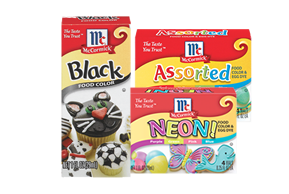
Today I’m sharing egg decorating tips from McCormick® Spices, who makes an Assorted Food Colors & Egg Dye and also a NEW Assorted NEON! Food Colors & Egg Dye!

How fun is that?
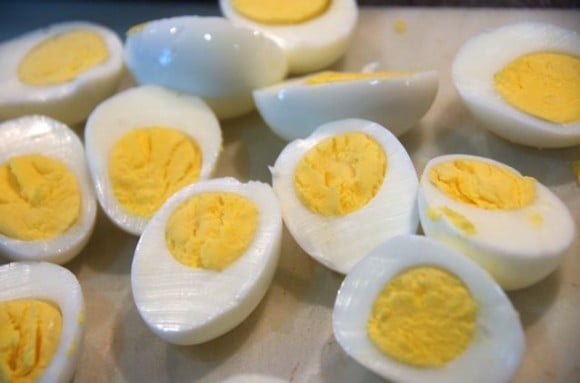
But first of all, I want to share their fool-proof recipe on how to hard-cook an egg. There are lots of ways to boil an egg, my way is actually different, but I tried this and it works GREAT! I don’t know about you, but I always want to be confident that my eggs will turn out. It seems they either don’t peel very well, or they are under-cooked inside!

FOOL-PROOF HARD-COOKED EGGS:
To hard cook eggs for deviling or dying, gently place eggs in single layer in medium saucepan. Add enough cold water to cover eggs with one inch of water. Bring just to boil on medium-high heat. Remove from heat, cover and let stand about 15 minutes for large eggs. After 15 minutes, pour off the hot water and rapidly cool eggs by running them under cold water (or place in ice water) until completely cooled. Refrigerate and use within a week.

Here are the adorable decorating tips!
COOL DECORATING IDEAS:
Two-toned eggs: Dip top half of hard-cooked egg in 1 color and the bottom half in another. Or, dip each half of the egg in the dye for different lengths of time, creating different shades of the same color.
Painted eggs: Mix 20 drops food color and 1/2 teaspoon vinegar in small container. Paint hard-cooked eggs with a small paintbrush or cotton swab. Go wild with stripes, polka dots and zigzags.
Designed eggs: Before dyeing, place rubber bands, stickers such as chicks, rabbits, flowers or other springtime favorites, or paper reinforcements on the eggs to create the design of choice. Once dry, remove the rubber bands, etc., to view the design.
Personalized eggs: Write initials, names or draw pictures on the egg with a white or light colored crayon before dyeing.
Marbleized eggs: Mix 1/4 cup boiling water, 1 teaspoon vinegar, 1/8 teaspoon oil and 4 to 8 drops food color in shallow bowl. Gently roll egg in the mixture for 30 seconds, or until the egg is the desired shade. Transfer the egg to a second color mixture, and repeat the process. Allow the egg to dry completely. Wipe away excess oil with a paper towel.
Tie-dyed eggs: Place several eggs in a colander in the kitchen sink. Splash eggs with vinegar. Drop yellow food color onto eggs. Gently shake the colander for a few seconds to help the color spread. Let stand 30 seconds. Repeat with 1 or 2 additional food colors. After the final stand time, lightly rinse eggs with water. Drain completely. Allow eggs to dry.
I hope you enjoy and get your kids, friends and family in the kitchen this Easter – it’s always more fun when everyone is helping out!
Will you be dyeing eggs this Easter and who will be helping you in the kitchen?
[print_this]
Recipe: Egg Dyeing Made Easy with McCormick Food Colors {ReluctantEntertainer.com}
Summary: Makes 12 colored eggs
Ingredients
- 1 dozen large eggs
- Vinegar
- McCormick® Assorted Food Colors & Egg Dye or McCormick® Assorted NEON! Food Colors & Egg Dye
Instructions
- Gently place eggs in single layer in large saucepan. Add enough cold water to cover eggs by 1 inch. Cover. Bring just to boil on high heat. Remove from heat. Let stand 15 minutes. (Adjust time up or down by 3 minutes for each size larger or smaller.)
- Pour off hot water and rapidly cool eggs by running them under cold water (or place in ice water) until completely cooled.
- Mix 1/2 cup boiling water, 1 teaspoon vinegar and 10 to 20 drops food color in a cup to achieve desired colors. Repeat for each color.
- Dip hard-cooked eggs in dye for about 5 minutes. Use a slotted spoon, wire egg holder or tongs to add and remove eggs from dye. Allow eggs to dry.
Preparation time: 30 minute(s)
Cooking time: 25 minute(s)
Number of servings (yield): 12
[/print_this]
This post is sponsored by McCormick® Spices; but as usual, all opinions are my own.


I featured you on Blissful and Domestic today! Stop by and check it out! http://www.blissfulanddomestic.com/2014/04/6-frugal-ways-to-dye-easter-eggs.html
Easter: I love the coloring of eggs…and we have been making “bunny butter” for years. Use a candy mold with small bunny pattern and insert softened butter. Cool in refrigerator to harden. Serve with Easter dinner. Make days ahead.
Of course we’ll be decorating eggs over here! I just showed your post to my girls…they’re running to gather rubber bands as I type! ;)
Such great tips! I love the idea of personalizing the eggs.
Great tips! My boys all love dying eggs, no matter how big they get!
Oh my goodness – your eggs are adorable! I especially love the polka dotted ones. So cute!!! :)
Can’t wait to try their NEON colors! How fun!
Awesome tips Sandy. I love dying eggs to this day. So fun! Like your hard boil method too!
Great tips! Love McCormick!
Love this! I haven’t dyed eggs in so long…must do this year!