Canning Jam Part 3: Getting Your Family Involved in Canning

I hope you’ve enjoyed my canning posts on finding the inspiration you will need to get started canning.
One thing I learned early on about canning, which was passed down from my Mother and Grandmother, was to include my kids in helping with the canning process. It not only makes canning go quicker, but ultimately I’m hoping they will get the “canning bug,” and will keep this lost art of canning going in their families.
Including the family also gives a deeper appreciation for the work involved. We’ve had many kids over who love our canned foods, jams, etc. but realistically, they don’t have a clue the work that was involved. BUT … they do know it tastes better than the food you’d buy off the shelves.

Last week we harvested our strawberries and raspberries. We had more strawberries than raspberries (our raspberries are on their 2nd season) so I purchased more raspberries to even out the recipe, because this combination is our family favorite.
Last year I made FREEZER jam, but this year I decided to make the canned recipe.
How do I involve my kids? My son stemmed and prepared the berries. Many times they’ll help me fill the jars as well. When it’s applesauce season, I will cook the apples and prepare the canning supplies. Abby will make the applesauce completely on her own and fill the jars!

I then take the jars and place them in the hot water bath and finish up the canning process, but she’s always there to help and learn alongside me.
I’ll be sharing more about how to can with a water bath this Fall when it’s apple and pear season!

I’ll be honest here … canning makes a mess! Be prepared to do some heavy cleaning of big pots and wiping up lots of splatters.
Aw, the messes we make and the things we do for our families is just wonderful! :)
In my last post I shared about what supplies you’ll need to buy and keep on hand for canning your own jam. Today I’m going to show you how to get ready for canning.

Getting Supplies Ready to Can
1. Always sterilize your jars. I run them through the dishwasher right before I’m ready to can.
2. If the jars are hot about the same time your jam is ready, that is PERFECT.
3. If the jars are clean and sterilized in your dishwasher, or turned over on your counter, but they are no longer hot, right before filling the jar with jam, fill it with hot water. I used InstaHot water.
4. Never fill a cold jar with hot boiling jam, because it could crack the jar.
5. I never know exactly how many jars I’ll need, so I tend to wash extra so I have enough.
6. Count the number of jars that you have and count out the same number of LIDS and RINGS.
7. Use BRAND NEW LIDS each time you can, unless you are using the new reusable lids that are available now. (I have not tried these.)
8. Add the rings and lids to a pot of boiling water and boil for 1 minute. This will sterilize them.
Sterilized jars on the counter filled with hot water, ready to fill with jam.
These are lids.

These are rings.

These are other miscellaneous canning tools you will need.

Join me tomorrow as I share our family’s favorite Strawberry Raspberry Jam. We treat it like gold in our house … it’s precious and we appreciate not only the sweet, tart flavor, but the energy that it took to grow our own berries and to take the time to process the jam.

Teaching our kids to can is allowing this once-lost art of canning to continue to the next generation.
That is very important to me and I know to others who appreciate its value!
If you have children or grandchildren, or even neighbor kids, do you ever include them in cooking, canning, and food preservation?
If you missed …
Canning Jam Part 1: How to find you passion and get started
Canning Jam Part 2: Supplies you will need for canning
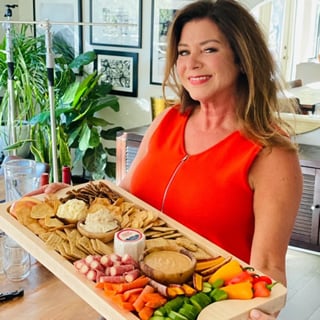
Hello and welcome to my home and table!
I’m Sandy—lover of food, family, cooking, THE BIG BOARD, travel, and bringing people together. Through great recipes and connection around the table, we become better, stronger, and more courageous people. Feasting on Life is real, and every time we do it, we grow a little more. Read more...


Super cool blog – what a fun surprise to see MY bowl in one of your pics! When I was a little girl my mom had this big red and green bowl (we kids called it the Hawaiian bowl) that always came out when something good was going on in the kitchen. I don’t remember the food but I remember the bowl. My mother gave me her bowl for Christmas last year – thought it was one of a kind. I have never seen another and have no clue as to the maker or anything and neither did Mom. What fun to see its exact twin on this blog filled to the brim with strawberries! Looks like your children will have some happy memories as well.
I have been “putting up” food for 40+ years. It’s so nice to read these posts about so many families
canning. Getting your children involved is so important. All three of my kids helped bottle fruit,
learned to use the cherry pitter, helped put food through a hand food mill and stir lots of batches
of jam. I now make my apple butter in a slow cooker (leaving it to cook on low over night) and this
has saved scrubbing pots with burned spots. :) I also dehydrate and freeze food for winter meals.
It’s so nice to plan a meal and know you can go to the pantry to get jars of yummy homemade treats. I’m new to your site but plan to come back often. Putting food by is healthy, inexpensive
and fun to share with family and friends. Many “convenience” foods can be made at home and
stored in the pantry. :) Thank you for encouraging families to bottle their own food.
My children love canning! They like being able to can the food that they grew! It makes a great family activity, they learn be self-suffient and that they can help with feeding their family! Thank you for the post!
I am having so much fun reading your canning posts and I can’t wait for the raspberry jam. Nummy!!