Gardening and Building Raised Beds in the City

I’m excited to be sharing with you my new Gardening Series. Come back each week as I hope to have regular updates throughout the spring/summer months! I will say that my husband has more of a green thumb than I do, but I’m consistently getting more involved and really enjoying it.
There’s just something about growing your own food.
And did you know this? Fruits and vegetables start to lose flavor and nutrients within ONE HOUR of being picked.
So of course it’s ideal for us to grow our own produce in our backyards, even if we live on a city lot.

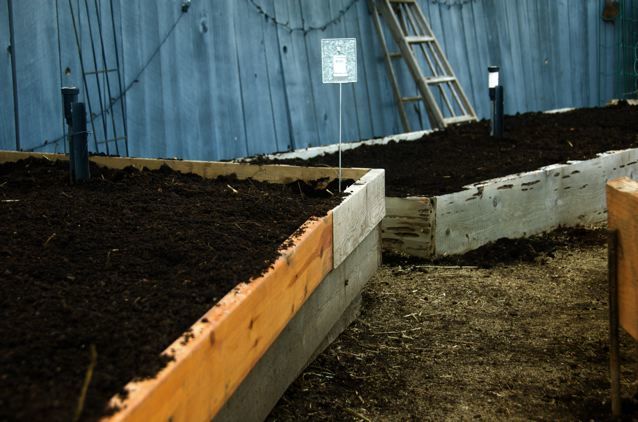
Which is true for our family because we do live on a city lot. Now it’s a rather large city lot, but when we moved here there was only one small garden bed, which is now our strawberry bed. (above photo)

So we took down trees, moved the dirt around, brought in new dirt, and built raised beds. Just recently we’ve added 3 more raised beds, a couple of years ago we built our $5 compost bin, and last year on Mother’s Day, my husband gave me an herb trough, right outside my back kitchen door.

Why raised beds?
There are two types of garden beds to choose from: raised or mounded. We’ve tried many different ways of growing vegetables over the years, and by far, the most enjoyable method thus far is raised beds. You don’t have to bend down as far and it’s very clear where the garden begins and ends. And if you do it right, you can really minimize the weeds. Also, since the soil in a raised bed is elevated a bit off the ground, it is generally warmer and you can start planting your garden earlier than in a mounded bed.
How to build the beds
For a city lot, by and large, raised beds are the most attractive, too. To get started you have two choices: lumber yard wood (very expensive 2×12 in either punky cedar or redwood) which lasts much longer than other forms. It looks fantastic, too! You can even stain the wood. If you know the dimensions that you need, they’ll even cut it ahead of time and when you get home you can screw the beds together.
Remember to recycle
The other choice is scavage wood scraps. We used wood from our kitchen remodel, and most recently we recycled our kids’ old bunk beds. But look around and see who is getting rid of wood or scraps.
-Draw out your backyard on paper and where you want to place your garden beds (to scale, if you can).
-Make a frame about 1 foot high, and 4 – 8 feet long x 4 feet wide. (Length doesn’t matter as much as width.)
-Plop it down on the area that you want the bed to be placed. Make sure to use a level to level it out.
-Place newspaper or brown paper bags on the bottom area and water.
-Place compost inside the frame, topping with organic gardening soil.
In our back yard, some of our beds are wider than 4 feet. That’s because of the overall shape of our backyard. We wanted to maximize the garden space as much as possible, so we went wider. But you’ll find people who do kitchen remodels or home improvements often will just let you have their leftover wood!
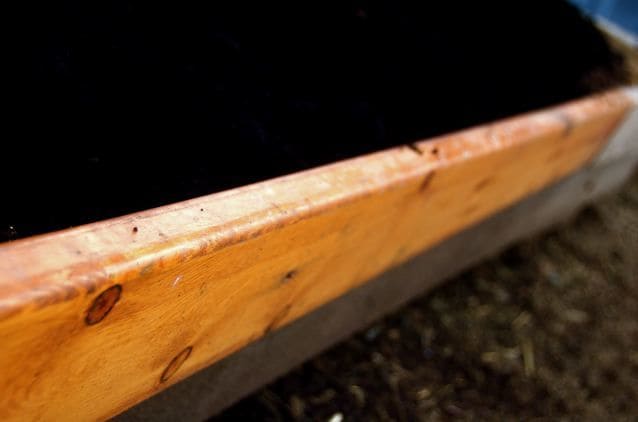
Bunk beds turned raised beds
Our newest bed has a little bit of sentimental value to me. This last year we no longer needed our bunk beds, as one son moved to college and the other 2 teens got larger beds. It was sad to see everyone outgrow the bunk beds! Each kid had this set in their room at one time or another. A bed for them and a bed for their friends to spend the night. :) Anyway, to the side of the house the wood went, and my husband had in mind that he’d make more raised beds with it.
Here’s a little sneak peek of what our beds will be producing in another month or so … mouth-watering lettuce. The best ever when it comes straight from the garden.

Well, enough for today. I’ll be exploring more about gardening in the weeks to come, and of course we all know that each garden is different depending on what zone you live in.
Do you have raised beds, mounds, plants in pots, or is gardening “new” to you this year?
[Please feel free to leave me any comments/questions for future posts.]
One year ago I wrote 2 simple gardening posts:
New Gardener Part 1: Get Started Now
New Gardener Part II: Water, Sunshine, Soil





Sandy! These are fabulous! I love that you re-purposed the bunk bed into your raised bed garden. Love it!! Well done. I’m envious of your warm weather down there…I may have to road trip to the south!
Your raised beds look great! I really want a garden and my husband has offered to to build me raised beds like yours, but we can’t figure out how to keep the dog and the kids out of them, unless we build them tall. They all love to dig in the dirt.
we have rasied beds and love them…just in the process of putting a kitchen garden at the cottage. I’m looking forward to seeing what you do with yours…..it will be fun, plus I can’t wait to get ideas from you.
Happy Planting.
Finally, FINALLY it has stopped raining. It is glorious this week and every evening I go out into my beautiful, brand-new back yard. It is so peaceful back there, especially since my sweet husband came home early and tamed the over-grown lawn! We are hitting the nusery this weekend and stocking up on annual herbs and maybe even a few veggies. Now that the lawn is in, we’re going to build our first compost bins this year, and maybe even a raised bed or two! So excited…
We have raised beds too and I love them. I don’t know if you mentioned it or not because I scanned quickly but it’s important not to use treated lumber because it will leach harmful chemicals into the soil…just in case anyone’s thinking of a better alternative;)
Aww how sweet that you recycled the bunk beds, that makes me smile. :)
I am loving this post Sandy! You know I am just starting out my garden…I’m totally inspired by yours!! My beds aren’t really “raised” they aren’t mounds anymore either. I used cedar and I’m loving the smell :) I’m excited to follow your garden series and see what you grow! I’m really learning alot as I go along…
I am so gald I happened upon your blog. Very interesting as I am all for fresh home grown produce
I want to get back to gardening, but seem to lack the ‘gumption’ to get it going. What about the Topsy-Turvy planters? Do they work? My parents got me started with one of those a couple years ago, but nothing ever grew.
I am so excited to follow your gardening series. We are working on getting our raised beds and small garden area cleaned up. There is nothing more rewarding than growing your own food and then cooking or preserving it for your family.
It looks heavenly, Sandy! I’m so tired of mealy fruit, soft cucumbers/celery/potatoes/carrots, and not finding fresh fruits and veggies in abundance throughout the winter months. Mr. YH promotes on Monday, but he told me the other day when he hangs up the flight suit, he wants to be a farmer! ha! I suggested we start with a garden- we’ll be revisiting these posts when we get a yard again!! :)