Best Sprinter Van Conversion: The Build

This post is about a Best Sprinter Van Conversion: The Build. Follow along how we converted our Mercedes Sprinter Van from shell to simple RV.

This is the first post to highlight our Mercedes Sprinter Van conversion (VW Westfalia to Mercedes Sprinter Van Conversion), including some links where you can purchase parts and accessories yourself if you want to take on such a challenge.
But stay tuned for more details in Sprinter Van Conversion Part 2: The Finish, coming soon!
Best Sprinter Van Conversion: The Build
For now, let’s get started!
Tools and material
- Table saw – 10 inch
- Chop saw – 12 inch
- Impact Drill
- Cordless Jig Saw
- Worm Drive Circular Saw
- Cordless Reciprocating Saw
- Dremel ultra Saw
- Bench Sander
- Bandsaw
- Cordless Brad Nailer
- 5-speed Drill Press
- Benchtop Cordless Planer
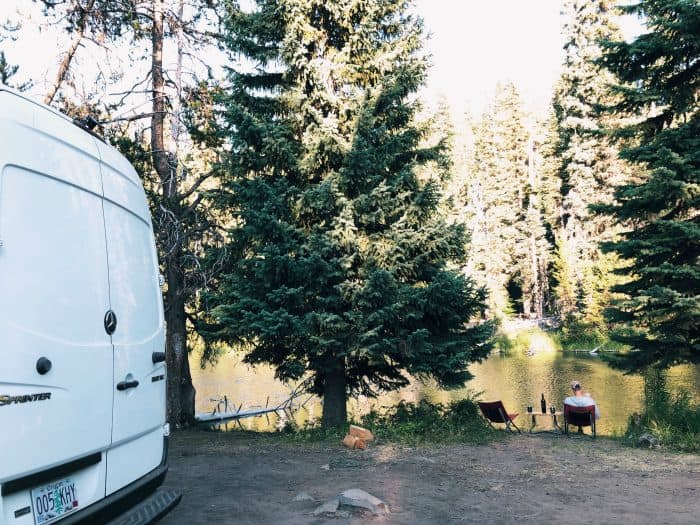
We bought our Sprinter Van to convert into a simple no-frills motor home. Only 20 minutes from our home is our favorite camping spot. We would tell you where it is, but we don’t want you to go there :)

There’s no hook ups. So we just pull up, set up, and fish and hike and just sit by the river … for hours.
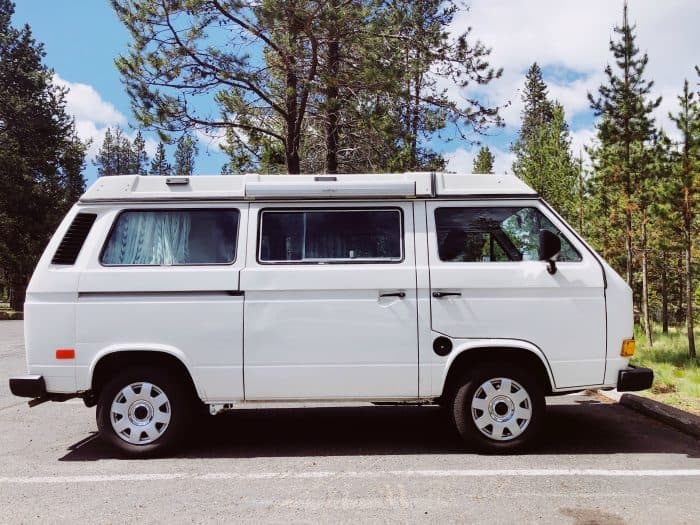
Goodbye ’87 VW Westfalia
For 10 years we owned Rosemary, our ’87 VW Westfalia, a full camper van that brought us to many great places and created great family memories. A sweet family of five have her now, and we know they will create great memories as well.
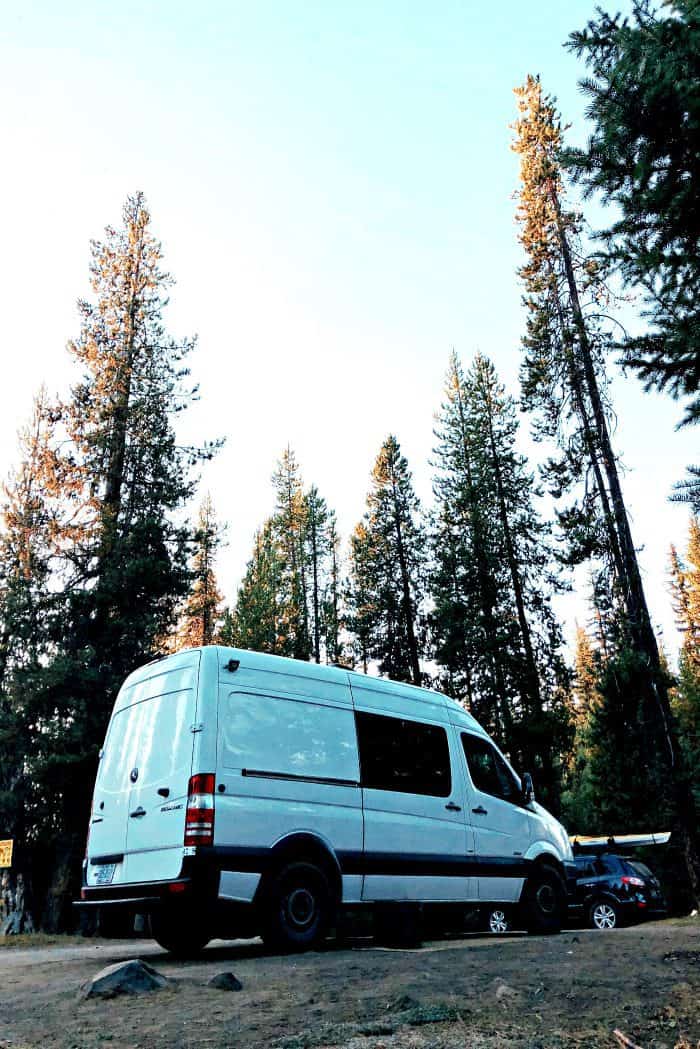
We are fortunate. We found a used, six-cylinder version, which has a better towing capacity (if or when we want to pull something). We love the spacious interior, and we converted it in such a way that it can still haul alot of stuff if we want to.
Next post: The Finish
Coming up in the next post: The finish. We’ll show what we did to make it fun and practical, such as a cargo rack to carry our kayaks, bikes, coolers, etc. We also plan to get an awning, a much needed accessory for summer camping!
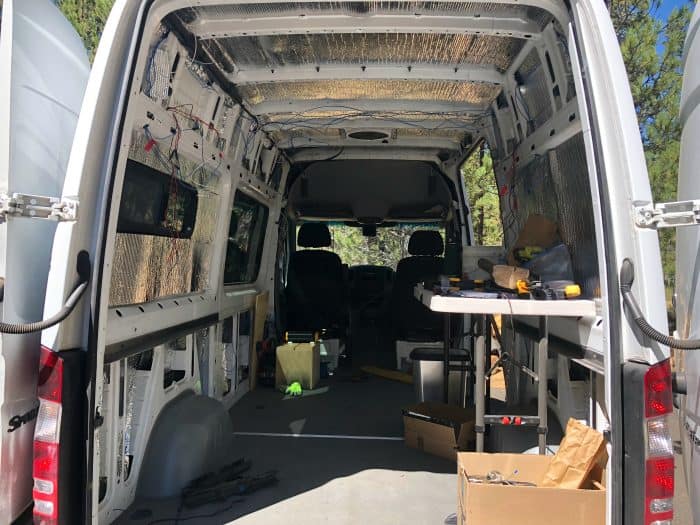
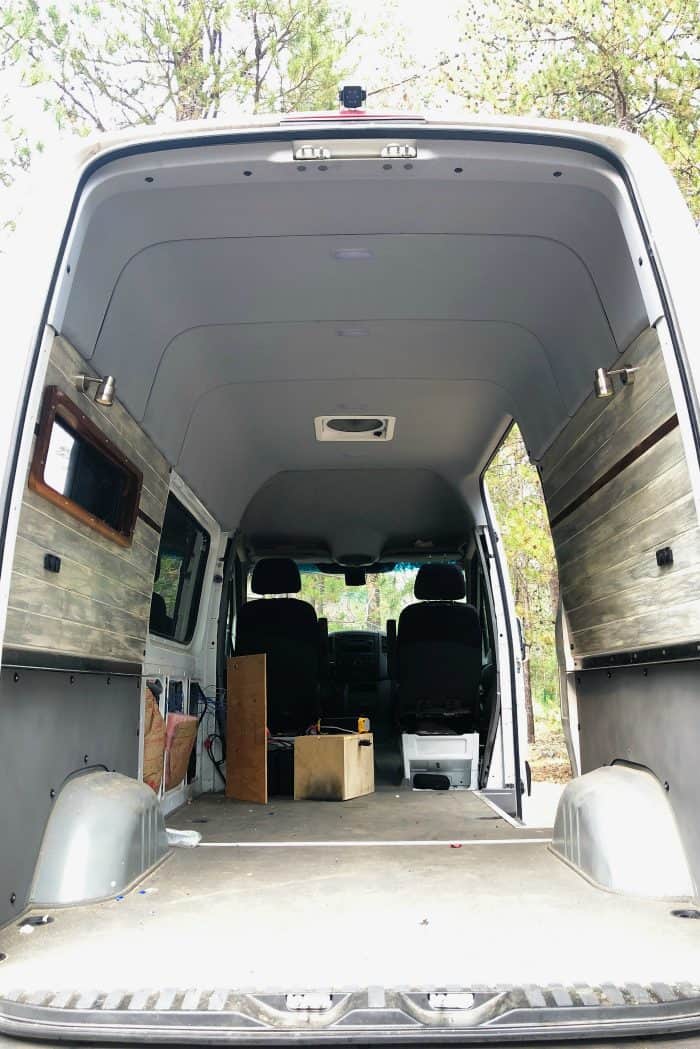
For now, this is how this former contractor’s rig looked when we bought it. You can almost smell the grime, can’t you? We sure did.
We took it down to the bones, which was actually pretty easy.
We had a budget, like most people do, so we went with a simple conversion, so that a person could use the vehicle for the weekend or longer. A person could probably live out of this thing if they had to, but it would be pretty darn rustic!
6-cylinder diesel
This light commercial vehicle seats only the two of us, but we could seat a whole bunch more if we wanted to by simply adding seating.
But since there are only two of us, we went with the 144-inch wheel base and the high top, which allows us to stand up, no problem (hunching over was a drawback with Rosemary), and park it easily in a standard parking space, something that is harder to do with the longer version.

Our van is rear-wheel drive. In addition to the tried and tested rear-wheel and all-wheel drive, the third generation van comes with front-wheel drive. Our goal was to use it in all seasons except deep winter. It’s also a big money savings (not going with the 4WD).
What we love about our Sprinter:
- We can actually stand up in it 24/7
- More storage
- Larger bed – the most comfortable bed!
- Better gas mileage
- Way better insulation than before
- Can remove the bed in less than a minute and haul very large objects
- We can fit our kayaks in, even with the bed in place
- Our kitchenette (details coming soon)

And we definitely love the peace of mind.
The Mercedes Sprinter is something to experience. It really is like driving a car. How something so tall handles so well is…you just have to experience yourself.
How much did it cost?
We paid $23k for our used Mercedes Sprinter Van, with only 80k miles.
Our conversion was roughly $12k.

Cost of Conversion Part 1:
We’ve never done anything like this, so we did what others do. Got anxious. Then we got busy. We went on YouTube and Pinterest, joined a few online groups, and settled upon a conversion that the average person can do. Here are the costs of the larger items:
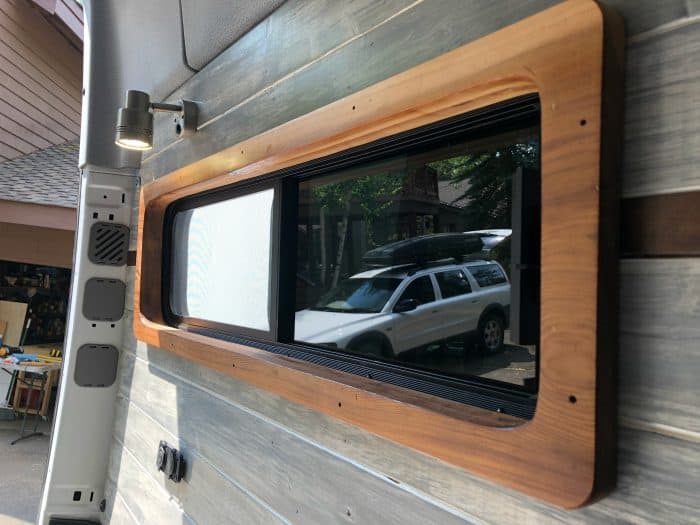
- Large Windows (installed) $320
- Windows (we installed) $150
- Used headliner and washable floor $200 [Steal!]
- 2-volt batteries in series that is also solar ready $1,500
- Maxxair MaxxFan Deluxe Remote Fan Lid $396
- LED Spotlights $24 (comes in pack of 4, we used 2)
- Electrical work $1,500
- Zinus Memory Foam Mattress $134
- Some of the more important tools (at the top)
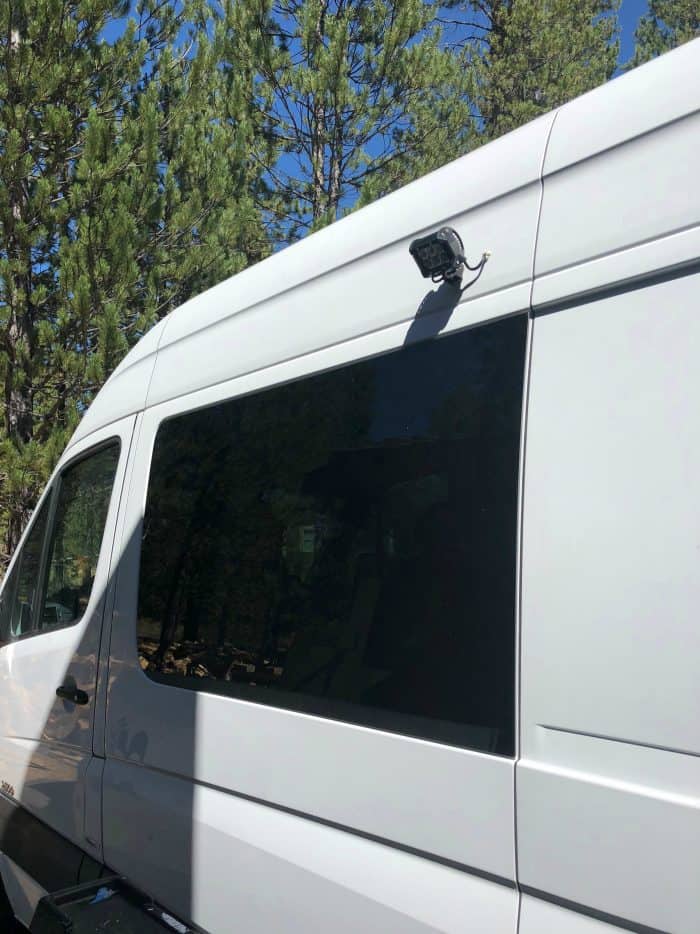
Large windows (installed by someone else with way more skill) $320
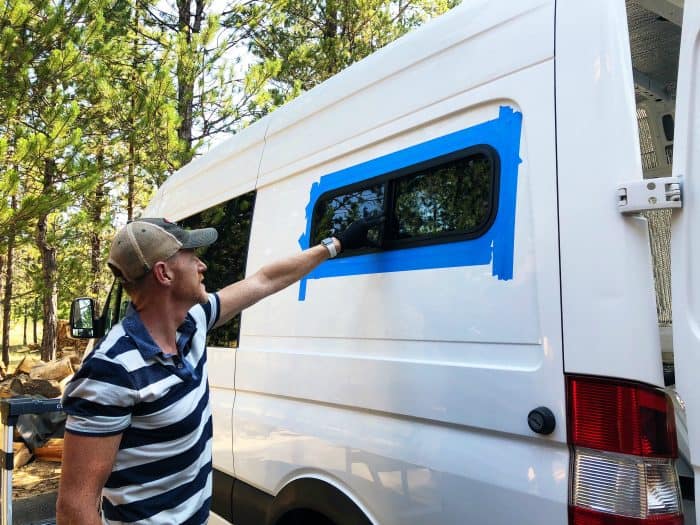

Windows installed by us: $150

Used headliner and washable floor $200


How much time did it take?
We installed the floor first, took a little break, then began the job in earnest. It took us about 2.5 weeks to complete, working half days.
You can really go crazy with one of these things, and God bless those who have the time and money to do so. But we’re not those people. Paul had about two weeks of slow time in the summer, so he devoted some of that time to converting the cargo van into a simple RV.

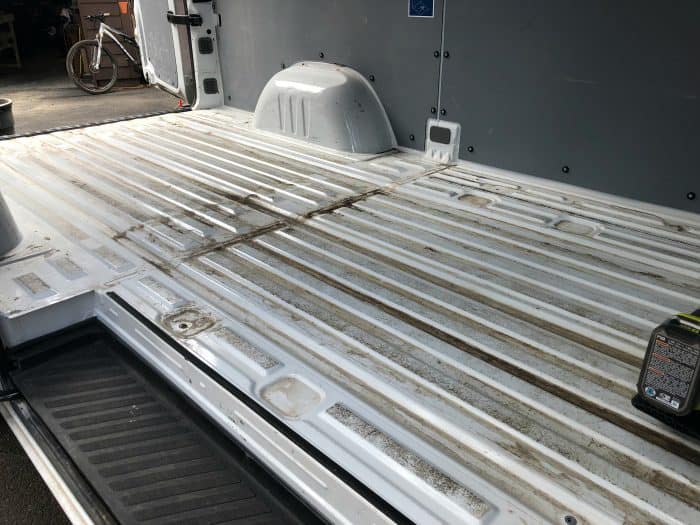
The floor
The very first thing we did on the Sprinter Van (after cleaning the inside) was install the van floors. The floors are a really important part of the install, and we lucked out, you guys! We went to a van conversion place that sold us used floors to lay down. We’ve seen a lot of build-outs that recommend doing the floors last, but we feel the floors are the first thing you want to invest in.

The floor we put down is a rubber-type, very easy to clean and a durable floor. These will stand the test of time. The salesman told us at the conversion place that he pulls out the “trendy wood floors” in Sprinter Vans all the time.

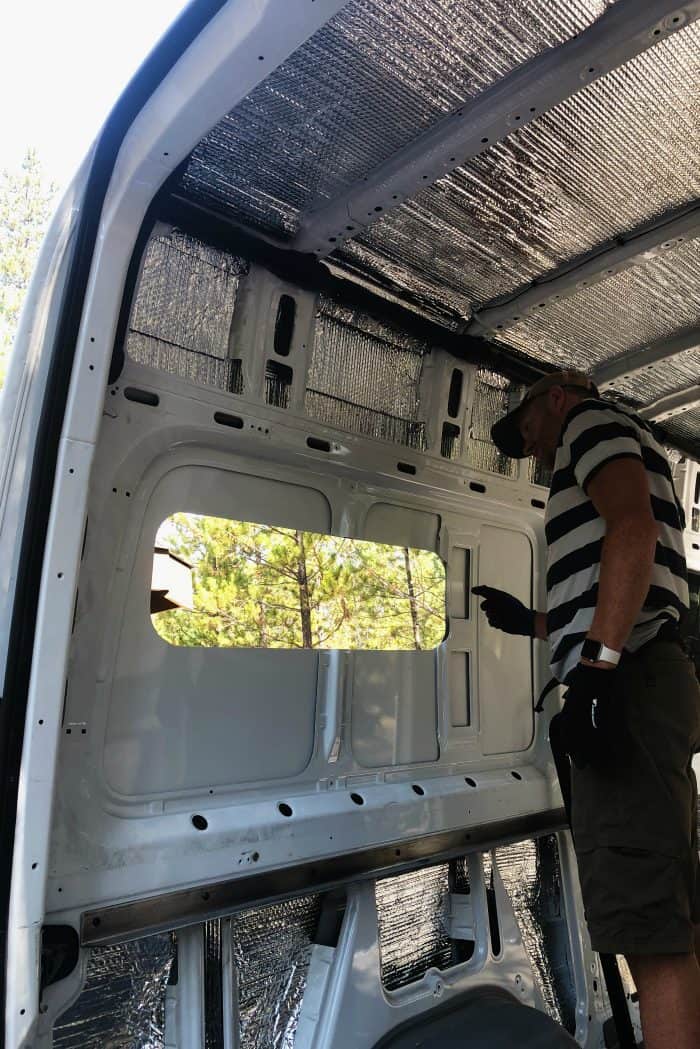
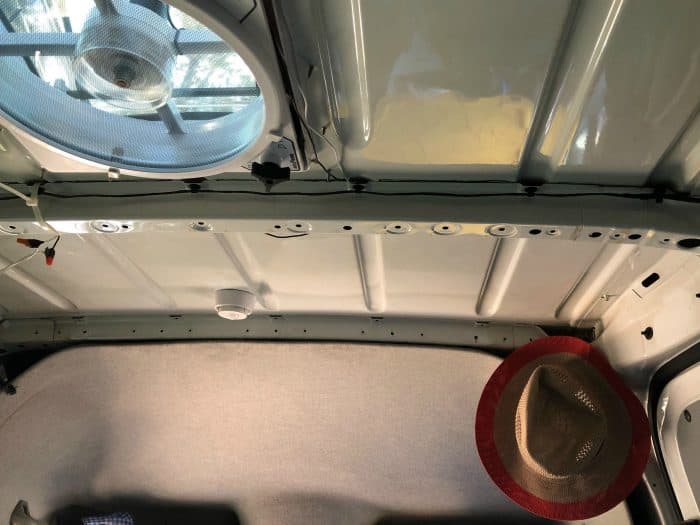
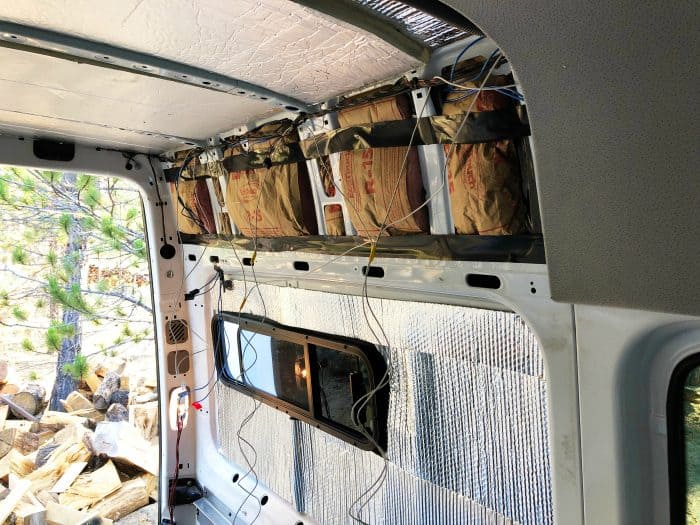
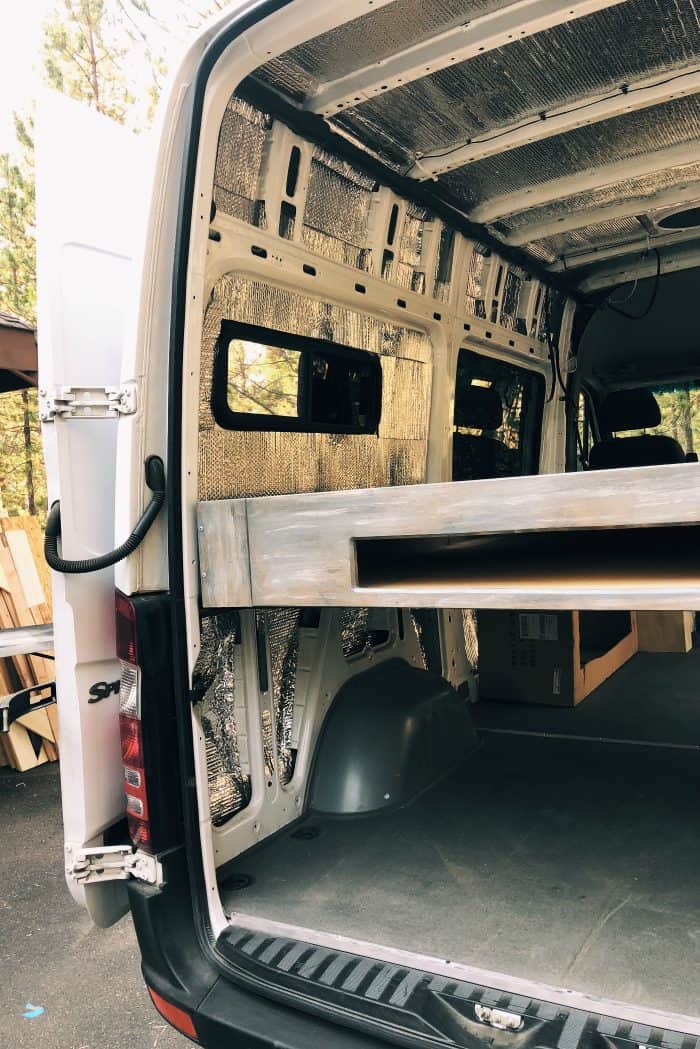
The insulation
We used three different kinds of insulation throughoutt the vehicle, giving us the best chance possible of staying warm and cool while in the great outdoors.

Ready to build
We removed the thin, plastic panels on the inside walls and kept those for templates. Now we were ready to build.
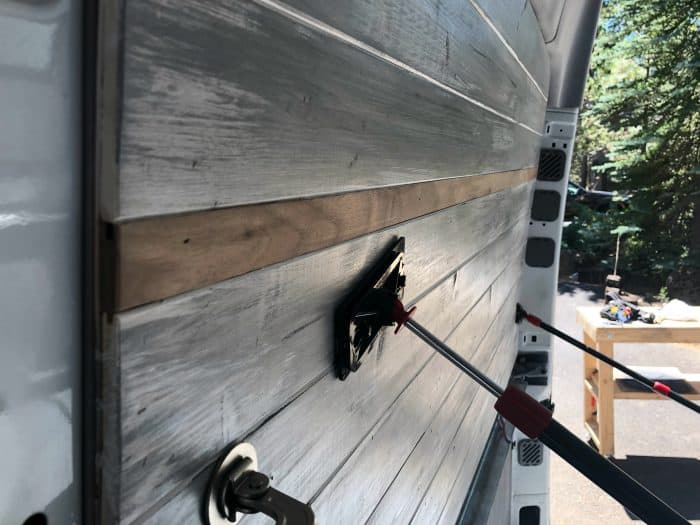
Once the wiring was in place, we moved onto the paneling where we wanted a beachy, white wash feel. On these panels we installed reading lights and USB chargers for all our devices.

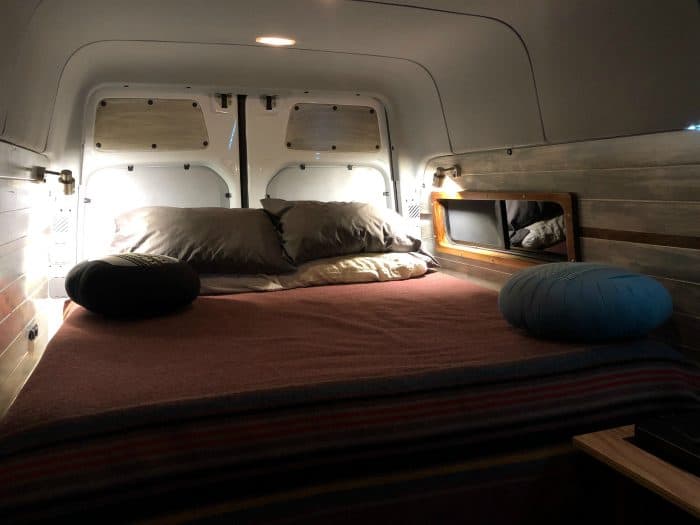
The bed
We designed a low profile, smart, attractive bed that included a hidden storage compartment that was easy to access from the rear of the vehicle. Paul measured it precisely so there would be no wasted space.
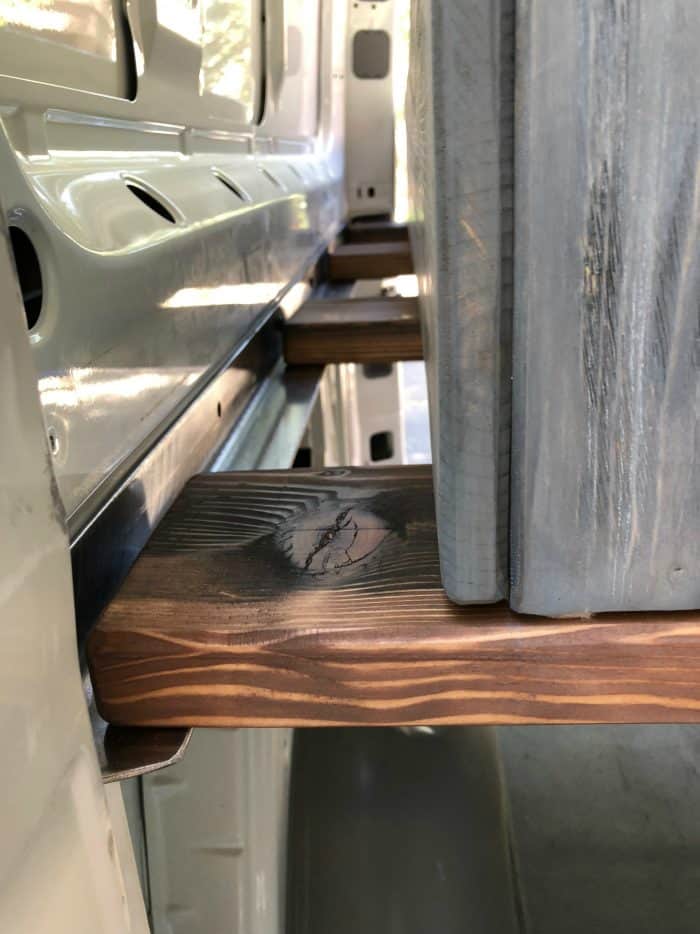
Then came the time to install it and….It didn’t fit. In order to install the bed, we had to put it on its side. We hadn’t accounted on the top of the van being slightly narrower than the bottom.
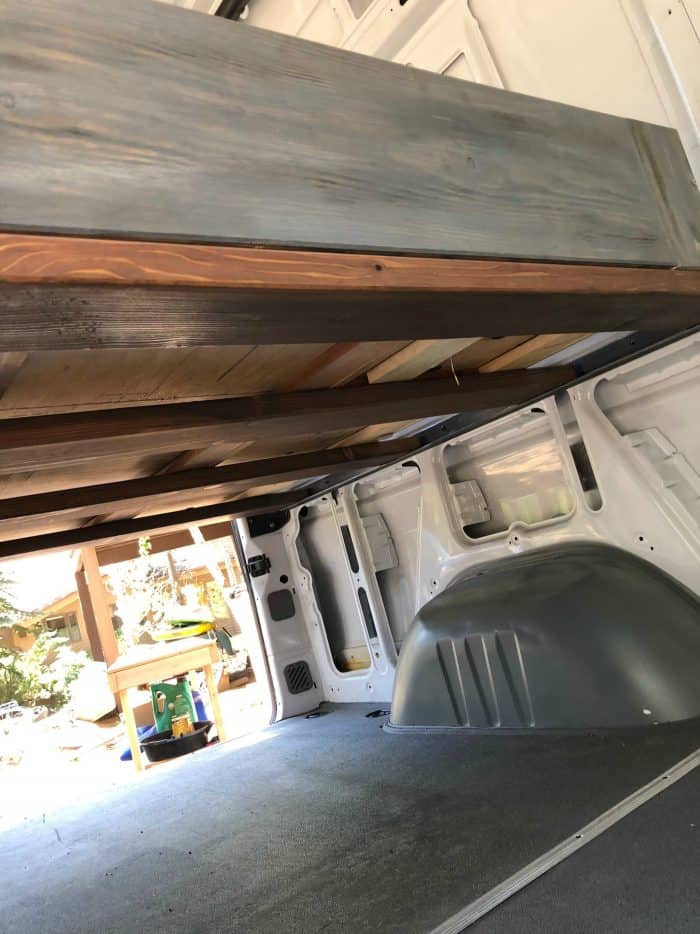
These few inches made it so the legs would not fit. So we eventually had to cut the legs off completely and install 2 1/2 inch angle iron to place the legless bed upon.
Paul cut the angle iron to length, then put a 22.5 degree angle cut off the back for looks.
Then with his WEN bench drill press, he drilled the holes that he would need to attach the angle iron to the sides of the van.
Angle iron comes with black stuff on it. Not having worked with it before, Paul thought he might be able to clean it up with his orbital sander. Not only was he able to remove all the black stuff, it came out looking bright and polished.


Bed brand
Zinus Memory Foam 6 Inch Green Tea Mattress, Short Queen. We did our research on fitting a bed into the space and this “short queen” was perfect. We had to slightly adjust, but the mattress is easy to cut! And comes highly recommended.


Pendleton Yakima Camp Thick Warm Wool Indoor Outdoor Striped Throw Blanket, Red Mountain (Alder the Whoodle, not for sale!) And below, reading lights (Link at the top).

Up next … Kitchenette
The van was done—except for one Big Momma, the kitchenette. We drew up a number of configurations before settling on our final one, which which we are very pleased with (complete with tiny, walnut backsplash). Stay tuned for PART 2, the kitchenette and more!

What’s left of the conversion?
- Kitchenette – countertop
- Awning
- Install rear bumper with cargo holder, bike holder and kayak holder
- Shelf above kitchenette with built in strip lighting
- Possibly install solar panels
- Upgrade to inverter/charger instead of just an inverter, so we can more easily charge our batteries
All the little details!
Come back for the final Sprinter Van post–the finished van!
This post has affiliate links. Every purchase from these links supports RE at no extra cost to you. Thank you!


Hello and welcome to my home and table!
I’m Sandy—lover of food, family, cooking, THE BIG BOARD, travel, and bringing people together. Through great recipes and connection around the table, we become better, stronger, and more courageous people. Feasting on Life is real, and every time we do it, we grow a little more. Read more...